
Table of Contents
Thanksgiving Cheese Ball
When it comes to Thanksgiving appetizers, we all know the drill. There are the deviled eggs, the veggie platter, and the spinach dip. But if you really want to impress your guests before the turkey even hits the table, you need something that screams “Fall.” You need The Ultimate Thanksgiving Cheese Ball.
But this isn’t just any cheese ball. We are taking a creamy, savory blend of sharp cheddar, cream cheese, and ranch seasonings, and shaping it into an adorable, edible pumpkin. Coated in crushed nacho-cheese tortilla chips (or bright orange cheddar) and topped with a real bell pepper stem, this appetizer looks like a festive decoration but tastes like pure savory indulgence.
It’s the perfect centerpiece for your holiday charcuterie board. It’s playful, it’s delicious, and best of all, it can be made days in advance, freeing up your precious oven space for the main event. Whether you serve it with crackers, pretzels, or crisp apple slices, this cheese ball is guaranteed to be the first thing to disappear at your gathering.
Let’s get rolling on the cutest appetizer you’ll ever make!
Why You’ll Love This Recipe
- Festive Presentation: Shaping the cheese ball like a pumpkin is surprisingly easy (we use rubber bands!) and creates a “wow” factor that guests love.
- Make-Ahead Magic: You can prep this up to 3 days before Thanksgiving. In fact, it tastes better after sitting in the fridge as the flavors meld.
- Crowd-Favorite Flavors: It’s essentially a loaded ranch cheddar dip in solid form. Who doesn’t love cheese and ranch?
- No-Cook Recipe: Save your stove burners for the gravy. This requires zero heat.
- Customizable: Don’t like ranch? Swap it for taco seasoning. Want it spicy? Add jalapeños. The base recipe is a blank canvas.
- Texture Contrast: The creamy inside pairs perfectly with the crunchy chip coating and the snap of a cracker.
Ingredients
Simple pantry staples come together to create magic.
| Ingredient | Quantity | Notes |
|---|---|---|
| Cream Cheese | 16 oz (2 blocks) | Softened to room temperature. Full-fat creates the best texture, but low-fat works too. |
| Sharp Cheddar | 2 cups | Shredded. Grate your own cheese! Pre-shredded cheese has anti-caking agents that prevent it from blending smoothly. |
| Ranch Seasoning | 1 packet (1 oz) | Or 3 tbsp of homemade mix. This provides the garlic, onion, and dill flavor profile. |
| Green Onions | 1/4 cup | Finely chopped. Adds a fresh bite and cuts the richness. |
| Bacon Bits | 1/4 cup | Cooked and crumbled. Real bacon is best, but the jarred stuff works in a pinch. |
| Nacho Cheese Chips | 1 cup | Crushed (Doritos or similar). This gives the “pumpkin” its bright orange color. Alternatively, use extra finely shredded cheddar. |
| Bell Pepper Stem | 1 stem | Save the top of a bell pepper to use as the “pumpkin stem.” |
| Plastic Wrap | N/A | Essential for shaping. |
| Thick Rubber Bands | 4 bands | Essential for creating the pumpkin ridges. |
Step-by-Step Instructions
1. The Mix
In a large mixing bowl (or stand mixer fitted with the paddle attachment), beat the softened cream cheese until smooth and fluffy. Add the shredded cheddar cheese, ranch seasoning mix, chopped green onions, and bacon bits. Mix on low speed until everything is evenly combined.
Chef’s Tip: If the mixture is too soft to handle, pop the bowl in the fridge for 15 minutes to firm it up.
2. The Shape
Scrape the cheese mixture out of the bowl and onto a large piece of plastic wrap. Gather the corners of the plastic wrap and twist them together to form the cheese into a tight ball. Ensure the plastic is wrapped securely.
3. The Pumpkin Hack
This is the fun part! Take 3 or 4 thick rubber bands. Place them around the plastic-wrapped cheese ball, intersecting in the center like you are cutting a pie.
- The first band cuts it in half.
- The second band cuts it into quarters.
- The third/fourth band cuts it into eighths.
The tension of the rubber bands will press into the soft cheese, creating the natural ridges of a pumpkin.
4. Chill and Set
Place the rubber-banded cheese ball in the refrigerator for at least 2 hours (or overnight). This chilling time is crucial for the cheese to hold its pumpkin shape once you unwrap it.
5. The Coat
When you are ready to serve, crush your Nacho Cheese chips (or cheese crackers) into a fine dust using a food processor or a ziplock bag and a rolling pin.
Remove the rubber bands and peel off the plastic wrap carefully. You will see the beautiful ridges!
Roll the cheese ball gently in the crushed chips until it is completely coated in “orange.”
6. The Stem
Place the coated cheese ball on your serving platter. Press the reserved bell pepper stem firmly into the top center.
Surround with crackers, veggies, or pretzels and serve!
Tips for Success
- Soft Cheese is Key: If your cream cheese is cold, it will be lumpy. Leave it on the counter for at least an hour before starting.
- Don’t Over-Crush: If you turn the chips into a fine powder, they might get soggy faster. Aim for a “coarse sand” texture for the best crunch.
- Rubber Band Tension: You want the rubber bands tight enough to make an indentation, but not so tight that they slice all the way through the cheese ball.
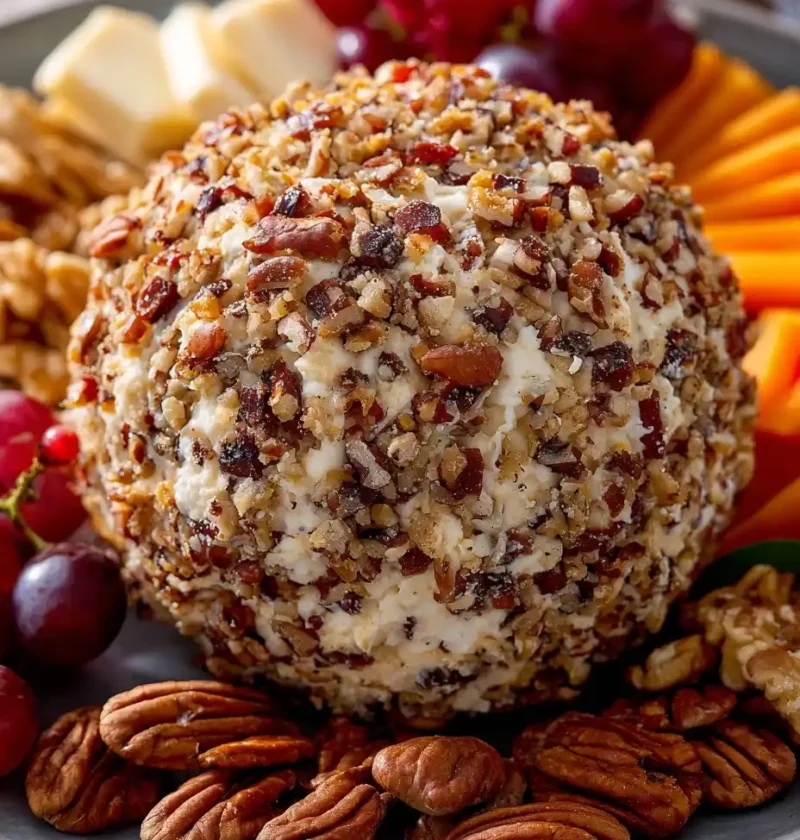
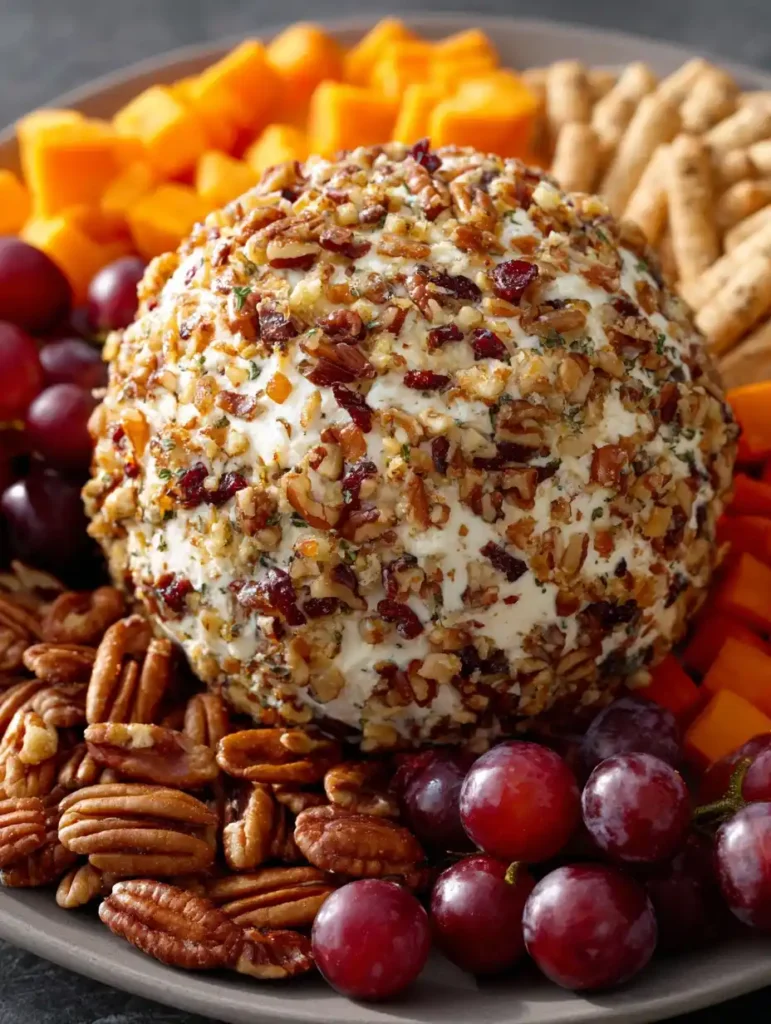
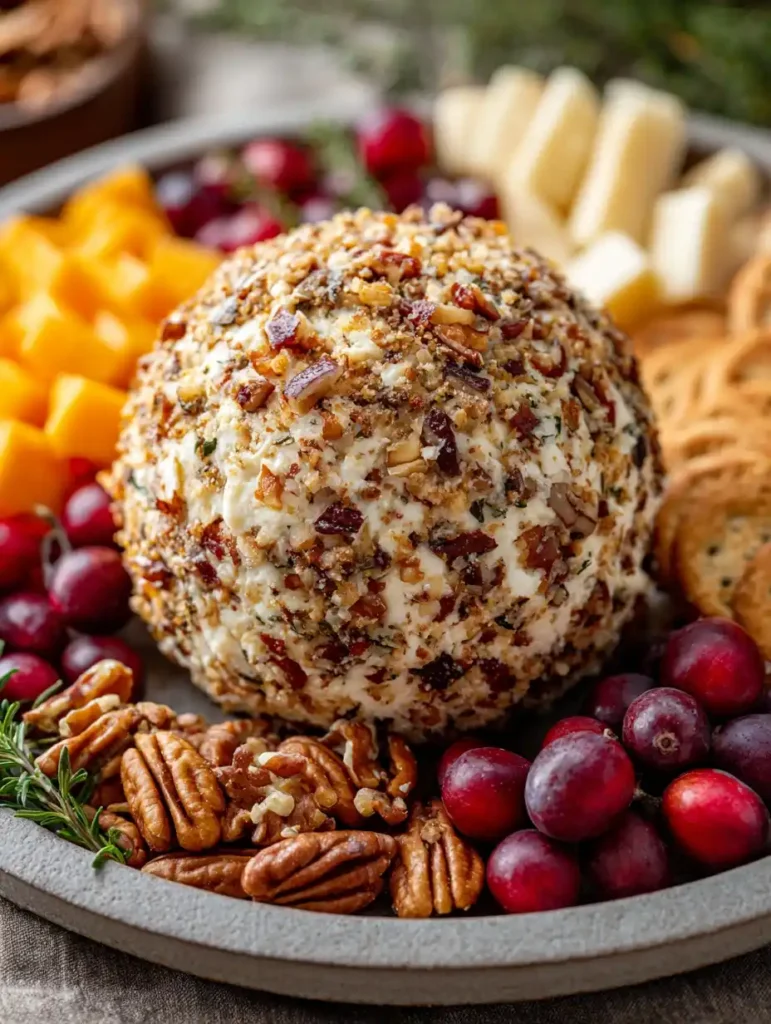
- Alternative Coatings: If you don’t want to use chips, you can roll the ball in paprika-dusted pecans or just finely shredded sharp cheddar for a different look.
- Serving Temp: Take the cheese ball out of the fridge 20 minutes before serving. It spreads much easier when it’s slightly softened.
Variations & Substitutions
- Spicy Pumpkin: Add 1 diced jalapeño and a dash of cayenne pepper to the cheese mix. Use Spicy Nacho chips for the coating.
- Sweet Version: Swap the cheddar/ranch for brown sugar and cinnamon. Coat in crushed gingersnaps. Serve with apple slices and graham crackers.
- Everything Bagel: Skip the pumpkin shape. Roll a round cheese ball in Everything Bagel seasoning for a modern twist.
- Pecan Crusted: For a more traditional look, skip the pumpkin shape and roll the ball in toasted chopped pecans and parsley.
- Turkey Shape: Shape the ball into a round body, stick a pretzel rod in for a neck, and use fan-shaped crackers (like Ritz) in the back to look like turkey feathers!
What to Serve With It
You need sturdy dippers for a dense cheese ball.
- Crackers: Ritz, Wheat Thins, or Triscuits hold up well.
- Pretzels: Pretzel twists or flat pretzel crisps are great for scooping.
- Veggies: Celery sticks, carrot chips, and bell pepper strips add a fresh crunch.
- Fruit: Crisp pear or apple slices pair wonderfully with the sharp cheddar.
- Bagel Chips: Garlic bagel chips add an extra savory element.
Storage
- Make Ahead: The uncoated cheese ball (wrapped in plastic) can stay in the fridge for up to 5 days.
- Leftovers: Store leftovers in an airtight container in the fridge for up to 3 days. The chip coating will get soft, but it still tastes delicious!
- Freezing: You can freeze the uncoated cheese mixture for up to 1 month. Thaw in the fridge overnight before shaping and coating.
Nutrition Facts
Here is the estimated nutritional breakdown per serving (makes 16 servings).
| Nutrient | Amount |
|---|---|
| Calories | 160 kcal |
| Protein | 5g |
| Carbohydrates | 4g |
| Fat | 14g |
| Saturated Fat | 8g |
| Cholesterol | 40mg |
| Sodium | 320mg |
| Sugar | 1g |
Dietary Note: Gluten-Free (if using GF chips/crackers) and Keto-Friendly (if coated in cheese/nuts instead of chips).
Common Mistakes to Avoid
- Using Pre-Shredded Cheese: I’m repeating this because it’s the #1 mistake. The potato starch coating on bag cheese prevents it from sticking to the cream cheese properly.
- Coating Too Early: If you roll it in chips the night before, the chips will absorb moisture from the cheese and turn into mush. Always coat right before serving.
- Forgetting the Stem: Don’t throw away your bell pepper top when prepping your veggie tray! Save it for the stem—it really sells the “pumpkin” look.
FAQ
Can I use a different seasoning?
Yes! Dry Onion Soup Mix (like my homemade recipe!) works perfectly instead of Ranch seasoning. Taco seasoning is also a fun twist.
How do I transport this?
Keep it wrapped in the plastic wrap and rubber bands in a cooler. Bring the crushed chips in a separate bag and the stem in a container. Assemble it on the platter when you arrive at the party.
Can I make mini pumpkins?
Yes! Scoop small tablespoons of the mixture and roll them into mini balls. Use a toothpick to draw the lines (rubber bands won’t work on tiny ones) and use a chive or pretzel stick for the stem. These make cute individual servings.
What if I don’t have rubber bands?
You can use kitchen twine (string) to tie around the ball, or just use the back of a butter knife to gently press indentations into the ball after unwrapping it.
Conclusion
This Thanksgiving Cheese Ball is the playful, delicious icebreaker every holiday party needs. It proves that you don’t need hours of cooking to create something memorable—just a little creativity and a lot of cheese.
So grab your rubber bands and get shaping! Your guests will be snapping photos of this adorable appetizer long before they snap a cracker into it.
If you loved this festive idea, try my Thanksgiving Gluten-Free Stuffing or my Thanksgiving Broccoli and Cheese Casserole for more easy holiday appetizers!

Thanksgiving Cheese Ball
Delightful and festive Thanksgiving cheese ball creations that are versatile and customizable to suit various dietary preferences. Explore a variety of cheese ball ideas, from classic to creative twists, to impress your guests during the holiday season.
Ingredients
- Sharp cheddar cheese
- Cream cheese
- Blue cheese
- Pecans/walnuts/almonds
- Bacon
- Dried cranberries
- Fresh herbs (rosemary, thyme, parsley)
- Honey
- Dried fruits
- Chocolate chips
- Assorted crackers
- Breadsticks
- Fresh veggies
Directions
-
Select a variety of high-quality cheeses like sharp cheddar, cream cheese, and blue cheese as the base for your cheese ball.
-
Incorporate nuts such as pecans, walnuts, or almonds for added crunch and flavor.
-
For a unique twist, add bacon to the cheese ball mixture for savory indulgence.
-
Roll the cheese ball in dried cranberries or decorate with fresh herbs like rosemary, thyme, and parsley for visual appeal and taste.
-
Experiment with sweet ingredients like honey, dried fruits, or chocolate chips to create a sweet cheese ball variation.
-
Serve the cheese ball with an assortment of crackers, breadsticks, and fresh veggies for dipping.
-
Shape the cheese ball into a festive design like a pumpkin, turkey, or cornucopia for a stunning Thanksgiving presentation.