Table of Contents
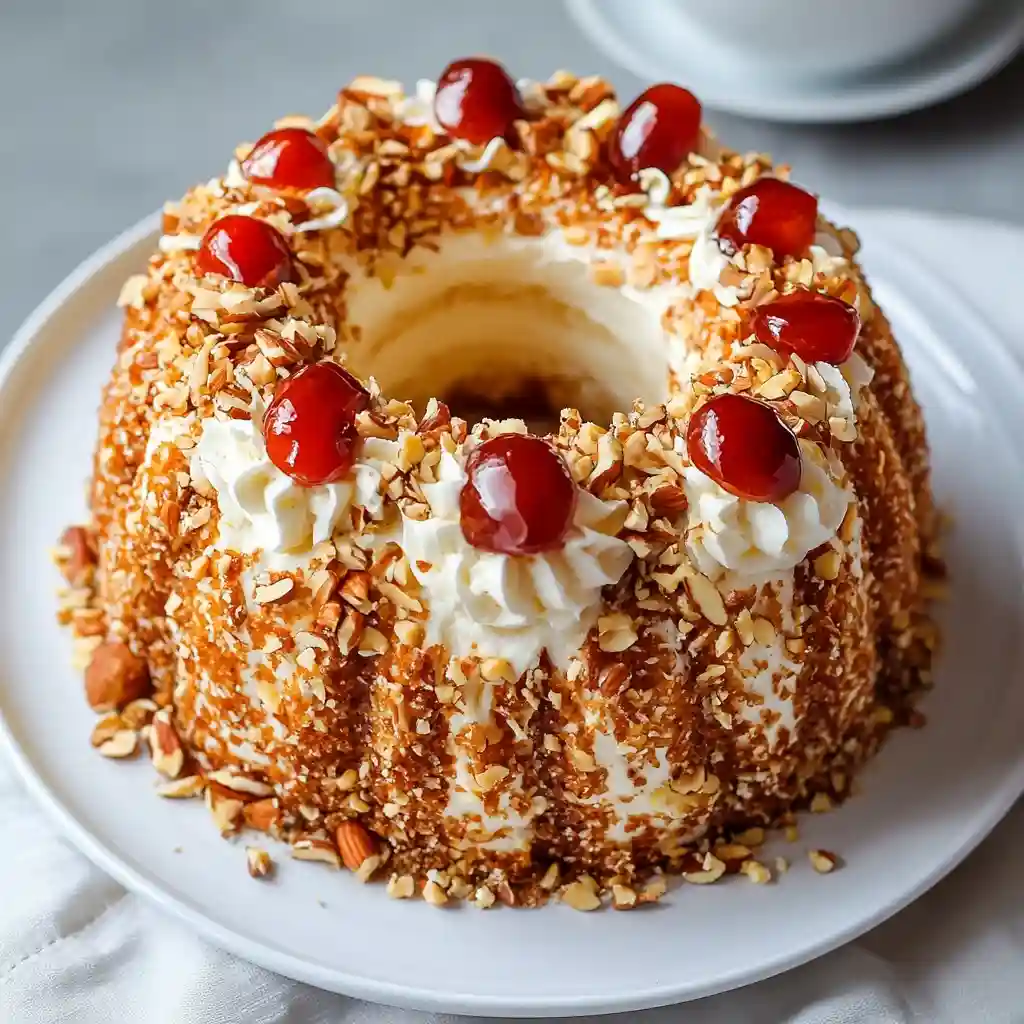
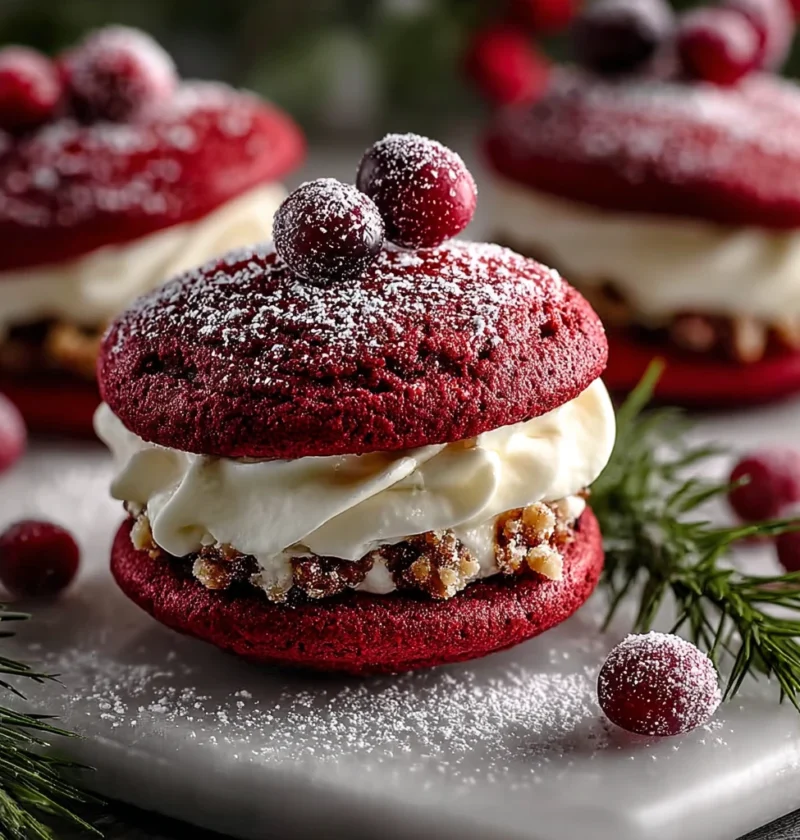
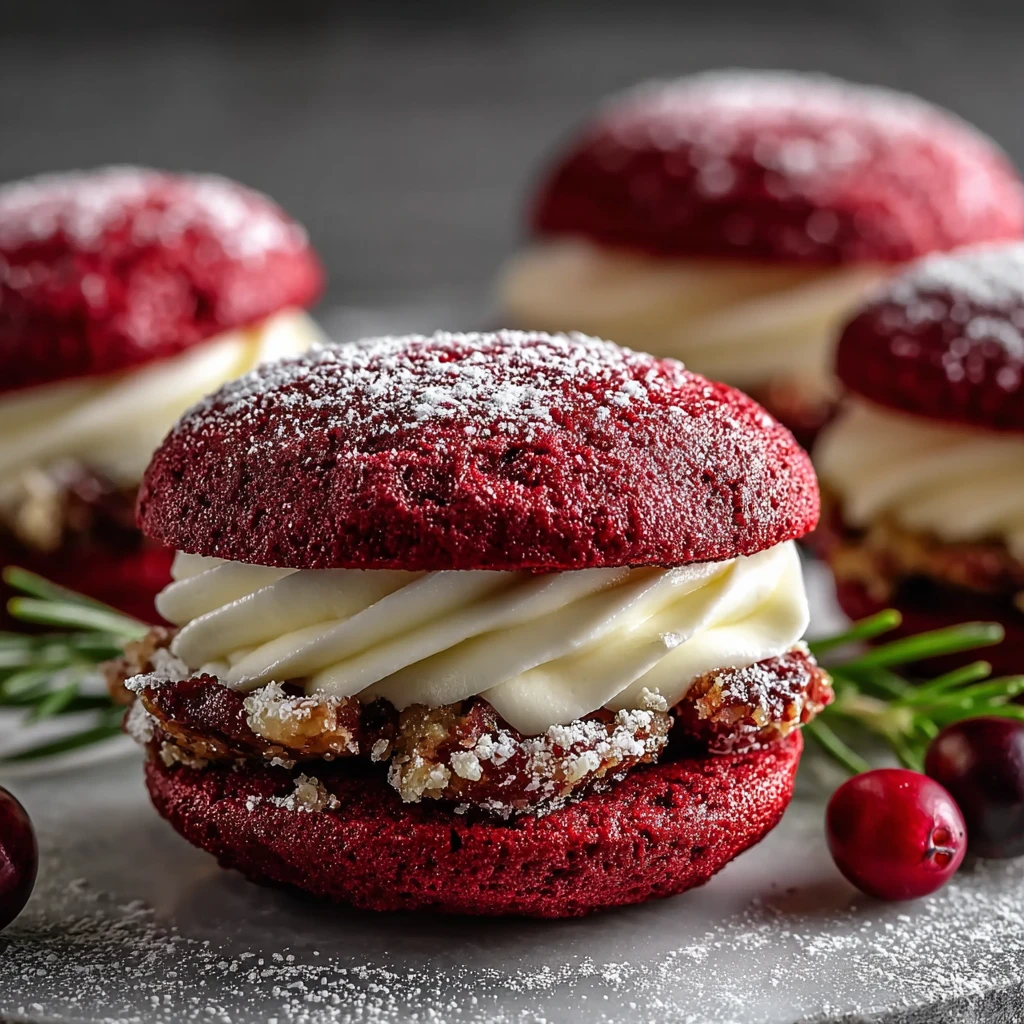
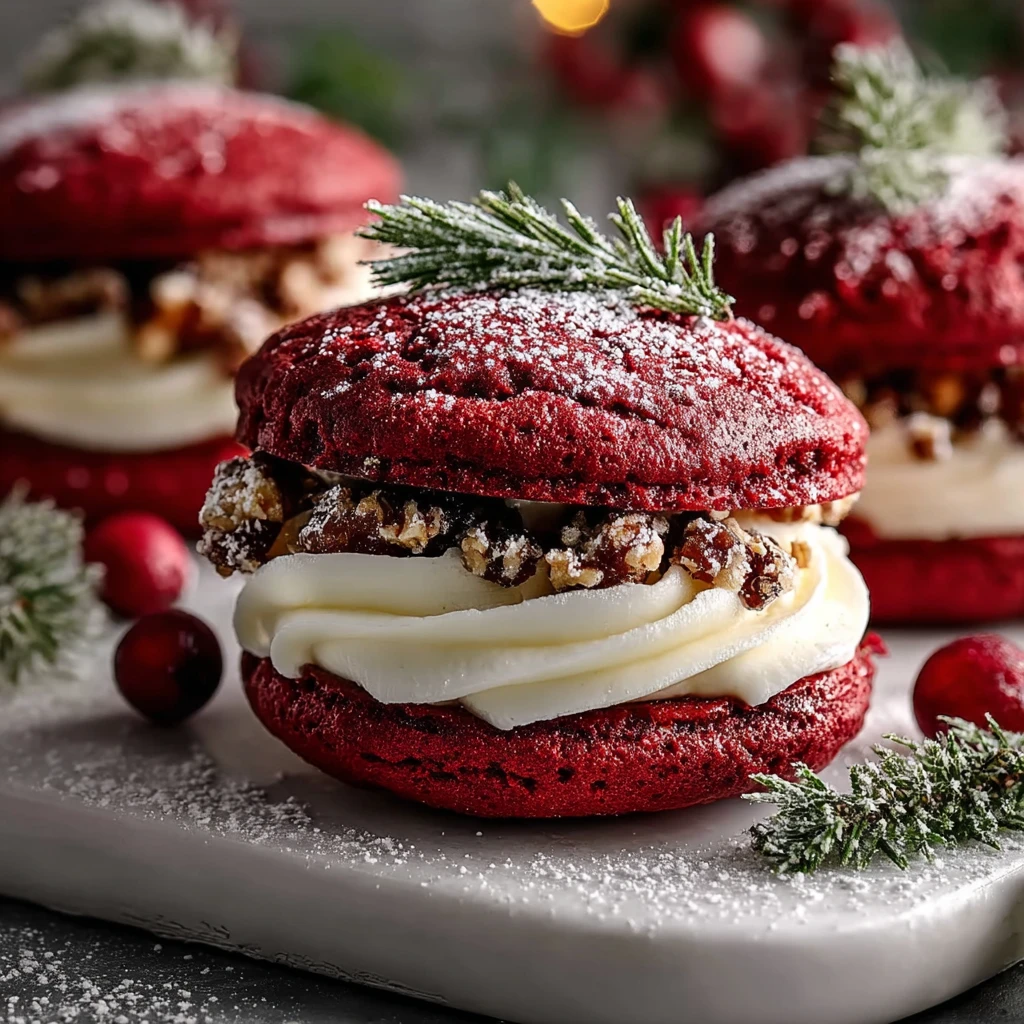
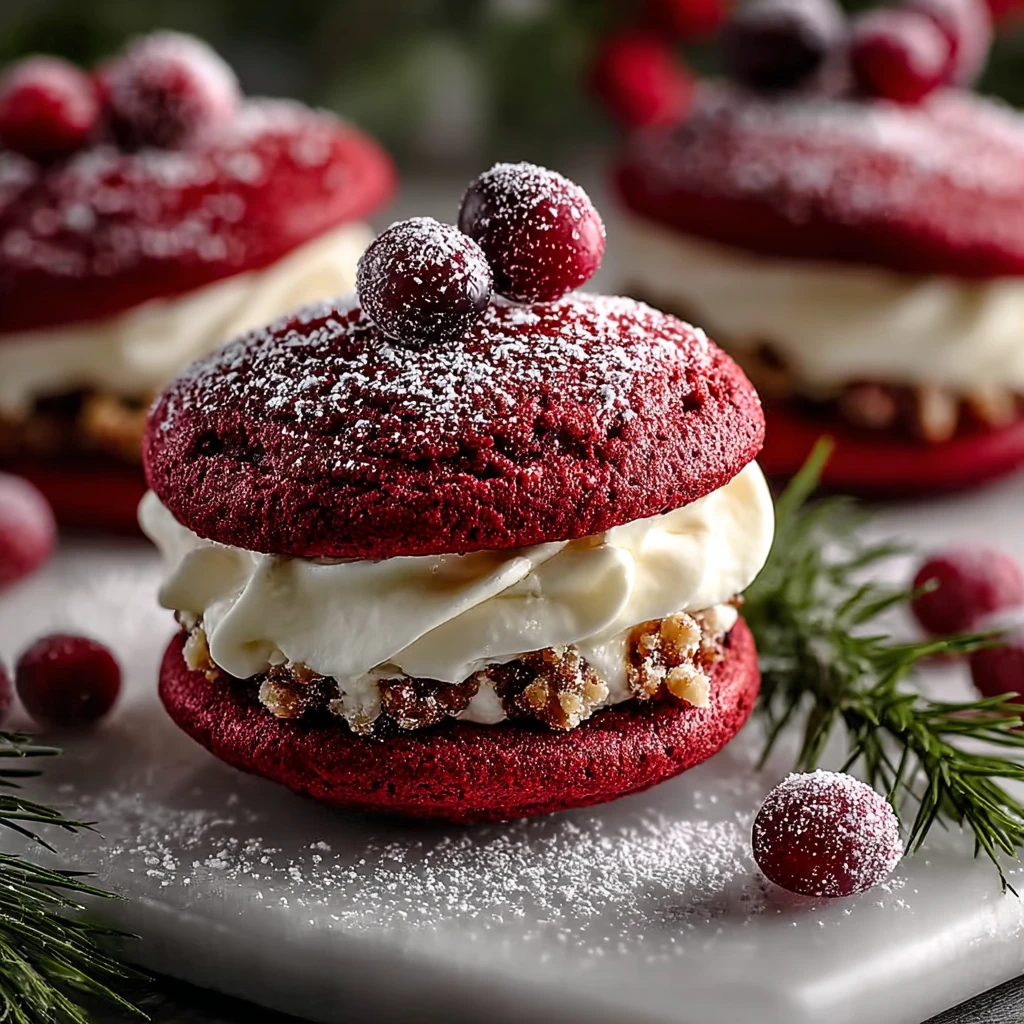
Red Velvet Wreath Whoopie Pies
Welcome to the world of delectable desserts where red velvet meets the whimsical charm of whoopie pies. Imagine sinking your teeth into a soft, velvety red cake with a creamy filling that melts in your mouth. The rich aroma of cocoa and vanilla dances in the air, promising a truly indulgent treat. Whether you’re celebrating a special occasion or simply craving a sweet delight, these Red Velvet Wreath Whoopie Pies are sure to captivate your taste buds.
As you take a bite, the luscious texture of the red velvet cake paired with the smooth cream cheese filling creates a perfect harmony of flavors. Each bite is a symphony of sweetness and decadence, leaving you craving for more. The contrasting colors of red and white add a festive touch, making these whoopie pies not only delicious but also visually appealing.
Let the allure of these Red Velvet Wreath Whoopie Pies transport you to a world of culinary bliss, where every bite is a celebration of flavor and texture. Get ready to embark on a delightful journey of baking and indulgence as we dive into the recipe.
Let’s get started on creating these festive and flavorful Red Velvet Wreath Whoopie Pies that are bound to become a favorite for any dessert lover.
Why You’ll Love This Recipe
If you’re a fan of red velvet desserts, these whoopie pies offer a unique twist on a classic flavor profile.
The combination of rich cocoa, tangy cream cheese, and fluffy cake creates a harmonious blend of sweet and tangy flavors.
Perfect for holiday gatherings or special occasions, these Red Velvet Wreath Whoopie Pies will impress your guests with both taste and presentation.
Indulge in a dessert that is not only visually stunning but also incredibly delicious, making it the perfect treat for any sweet craving.
Ingredients
For the Red Velvet Cake:
– All-purpose flour
– Cocoa powder
– Baking soda
– Salt
– Unsalted butter
– Granulated sugar
– Eggs
– Buttermilk
– Red food coloring
– Vanilla extract
– White vinegar
– Baking powder
– Cream cheese
– Confectioners’ sugar
– Heavy cream
– Vanilla bean paste
– Green food coloring
Step-by-Step Instructions
1. Preheat your oven to 350°F and line a baking sheet with parchment paper.
2. In a bowl, whisk together flour, cocoa powder, baking soda, and salt.
3. In a separate bowl, cream butter and sugar until light and fluffy. Add eggs one at a time, beating well after each addition.
4. Mix buttermilk, red food coloring, and vanilla extract in a small bowl.
5. Gradually add the dry ingredients and buttermilk mixture to the butter mixture, alternating between the two.
6. In a small bowl, mix vinegar and baking powder, then fold it into the batter.
7. Drop spoonfuls of batter onto the prepared baking sheet, forming wreath shapes.
8. Bake for 10-12 minutes until the cakes spring back when touched.
9. Allow the cakes to cool completely on a wire rack.
10. In a mixing bowl, beat cream cheese, confectioners’ sugar, heavy cream, and vanilla bean paste until smooth.
11. Add green food coloring to the cream cheese filling for a festive touch.
12. Spread the cream cheese filling on the flat side of half the cakes and sandwich with the remaining cakes.
Tips for Success
1. Make sure to use gel food coloring for a vibrant red hue in the red velvet cake.
2. Chill the assembled whoopie pies for at least 30 minutes to allow the flavors to meld together.
3. Dust the finished pies with confectioners’ sugar for a snowy effect before serving.
4. Store the whoopie pies in the refrigerator to maintain freshness and texture.
5. Bring the whoopie pies to room temperature before serving to enhance the flavors and texture.
Variations & Substitutions
For a chocolatey twist, add chocolate chips to the red velvet cake batter.
For a nutty flavor, sprinkle chopped pistachios or pecans on the cream cheese filling.
For a fruity touch, top the whoopie pies with fresh berries or a drizzle of raspberry sauce.
For a citrusy twist, add orange zest to the cream cheese filling for a refreshing flavor.
What to Serve With It
Pair these Red Velvet Wreath Whoopie Pies with a hot cup of cocoa for the ultimate cozy dessert experience.
For a festive touch, serve the whoopie pies with a sprinkling of edible gold or silver dust.
Add a scoop of vanilla ice cream on the side for a decadent dessert combination.
For a refreshing contrast, serve the whoopie pies with a side of fresh fruit salad.
Storage & Reheating
Store any leftover whoopie pies in an airtight container in the refrigerator for up to 3 days.
To reheat, place the whoopie pies in the microwave for 10-15 seconds or until warmed through.
For best results, enjoy the whoopie pies fresh on the day they are made to preserve their texture and flavor.
Nutrition Facts
Calories: 280 per serving
Protein: 4g
Carbs: 35g
Fat: 14g
Fiber: 1g
Sugar: 22g
Sodium: 180mg
These Red Velvet Wreath Whoopie Pies are a delightful indulgence suitable for special occasions and festive gatherings.
Common Mistakes to Avoid
1. Overmixing the batter can result in tough whoopie pies, so gently fold the ingredients together until just combined.
2. Skipping the chilling step can cause the cream cheese filling to ooze out when assembling the whoopie pies.
3. Using expired baking powder or soda can affect the rise and texture of the red velvet cakes.
FAQ
Q: Can I freeze the assembled whoopie pies?
A: Yes, you can freeze the whoopie pies in an airtight container for up to 1 month. Thaw in the refrigerator before serving.
Q: Can I use natural food coloring for the red velvet cakes?
A: While natural food coloring can be used, it may result in a less vibrant red color compared to gel food coloring.
Q: Can I make the cream cheese filling ahead of time?
A: Yes, the cream cheese filling can be prepared and refrigerated for up to 2 days before assembling the whoopie pies.
Q: How can I prevent the whoopie pies from sticking to the baking sheet?
A: Using parchment paper or silicone baking mats will prevent the cakes from sticking to the baking sheet.
Conclusion
Indulge in the magic of the holiday season with these Red Velvet Wreath Whoopie Pies that combine the richness of red velvet with the nostalgia of whoopie pies. With a festive wreath shape and a creamy filling, these whoopie pies are a delightful treat for any occasion. So, gather your loved ones, bake up a batch of these delightful treats, and let the flavors of red velvet and cream cheese create unforgettable memories.
Experience the joy of baking and savoring these Red Velvet Wreath Whoopie Pies that are sure to become a cherished dessert in your recipe collection. Share your feedback with us and spread the festive cheer with every bite of these delicious whoopie pies. If you enjoyed this recipe, try my Sticky Toffee Pudding Recipe Perfect for Dessert Lovers for another delightful dessert experience.
Red Velvet Wreath Whoopie Pies
Indulge in a delightful festive dessert with these Red Velvet Wreath Whoopie Pies that combine the rich flavors of red velvet cake with a creamy cream cheese filling. Perfect for any occasion, these whoopie pies are both visually stunning and incredibly delicious.
Ingredients
- 2 cups all-purpose flour
- 1/4 cup cocoa powder
- 1 teaspoon baking soda
- 1/2 teaspoon salt
- 1/2 cup unsalted butter
- 1 cup granulated sugar
- 2 eggs
- 1 cup buttermilk
- 1 tablespoon red food coloring
- 1 teaspoon vanilla extract
- 1 teaspoon white vinegar
- 1 teaspoon baking powder
- 8 oz cream cheese
- 2 cups confectioners' sugar
- 1/2 cup heavy cream
- 1 teaspoon vanilla bean paste
- Green food coloring
Directions
-
Preheat the oven to 350°F and line a baking sheet with parchment paper.
-
In a bowl, whisk together flour, cocoa powder, baking soda, and salt.
-
Cream butter and sugar until light and fluffy. Add eggs one at a time, beating well after each addition.
-
Mix buttermilk, red food coloring, and vanilla extract in a small bowl.
-
Gradually add the dry ingredients and buttermilk mixture to the butter mixture, alternating between the two.
-
In a small bowl, mix vinegar and baking powder, then fold it into the batter.
-
Drop spoonfuls of batter onto the prepared baking sheet, forming wreath shapes.
-
Bake for 10-12 minutes until the cakes spring back when touched.
-
Allow the cakes to cool completely on a wire rack.
-
In a mixing bowl, beat cream cheese, confectioners' sugar, heavy cream, and vanilla bean paste until smooth.
-
Add green food coloring to the cream cheese filling for a festive touch.
-
Spread the cream cheese filling on the flat side of half the cakes and sandwich with the remaining cakes.